
1. Introduction #
Welcome to the PickMyTrade Rithmic Setup Guide. This tutorial walks you through the full process of connecting your Rithmic account to PickMyTrade. Whether you’re a funded trader or managing multiple Rithmic accounts, this setup will allow you to automate your futures trades using TradingView alerts or strategy signals.
1. Registering on PickMyTrade #
- Visit PickMyTrade
- Register an account (if you already have a PickMyTrade account for Tradovate, you still need to create a separate account for Rithmic)

- Use the same email ID as your existing account (if applicable)
- Verify your email and log in

2. Connecting Your Rithmic Account #
- Go to the Broker Connections section.
- Select Rithmic as the broker and click on Rithmic Connection.
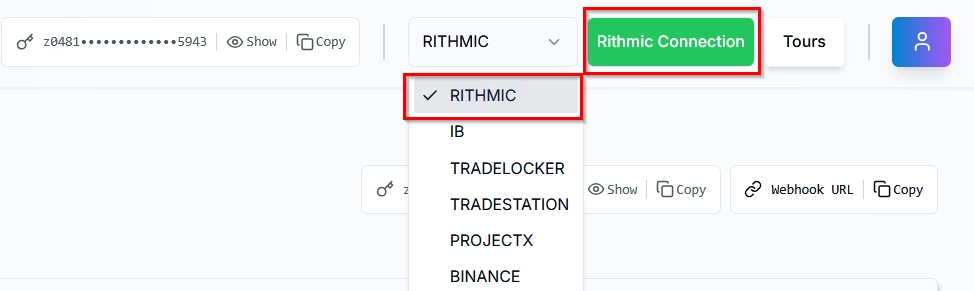
- Click on “Add Connection”.

- Enter your Rithmic Username and Password.
- Choose the System Name (it should match the system name used in Rithmic).
- Click Connect.
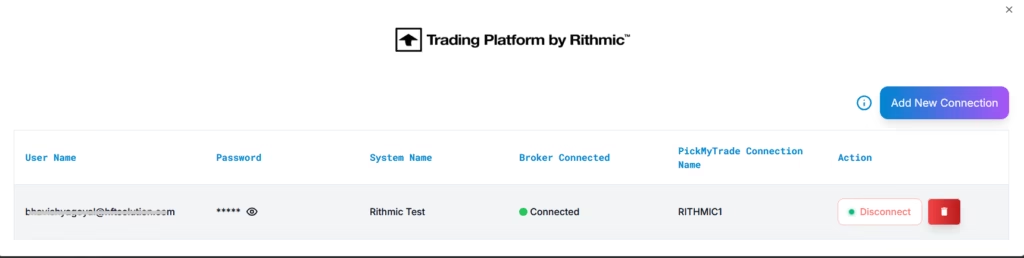
- If your credentials are incorrect, the status will show Disconnected.
- If correct, the status will update to Connected.
Note: PickMyTrade allows multiple Rithmic connections, but each additional connection costs $50 per month.
Important: Bulenox Not Supported — PickMyTrade currently does not support Bulenox accounts through Rithmic
3. Generate Alert #
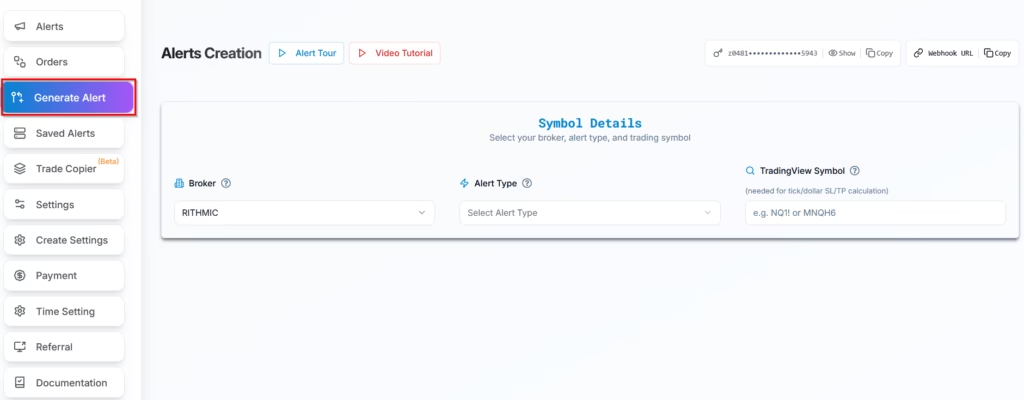
Navigate to the Generate Alert option from the homepage to create trade alerts.
4. Next Steps: Automate Your Trading Strategies and Indicators #
Once your Rithmic account is successfully connected to PickMyTrade, you can proceed to automate your trading strategies or indicator alerts.
For detailed guidance, refer to the following resources:
These guides provide step-by-step instructions to help you configure alerts and automate your trades effectively.
Important: R Protocol API Limitation #
The R Protocol API does not support temporary free demo/trial accounts. If you are attempting to connect using a demo/trial user ID, the connection will not work.
To connect via the R Protocol API, you must use a supported non-trial (live or eligible) account. If needed, verify with the Rithmic team whether your user ID is a demo/trial account before proceeding with further troubleshooting.
More Resources #
Ready to connect Rithmic?
See Rithmic automation on pickmytrade.io
Last updated: September 30, 2026


