1. Introduction to Automating TradingView Strategies for Interactive Brokers #
This guide explains automating TradingView strategies for Interactive Brokers (IB), covering setup for futures and stocks, symbol mapping, and order handling.
By integrating IB with TradingView, traders can execute strategy-based trades automatically based on predefined conditions. This setup ensures efficient trade execution while allowing for customization in exit handling, account selection, and stop loss/take profit management.
For a visual walkthrough, refer to the accompanying video:
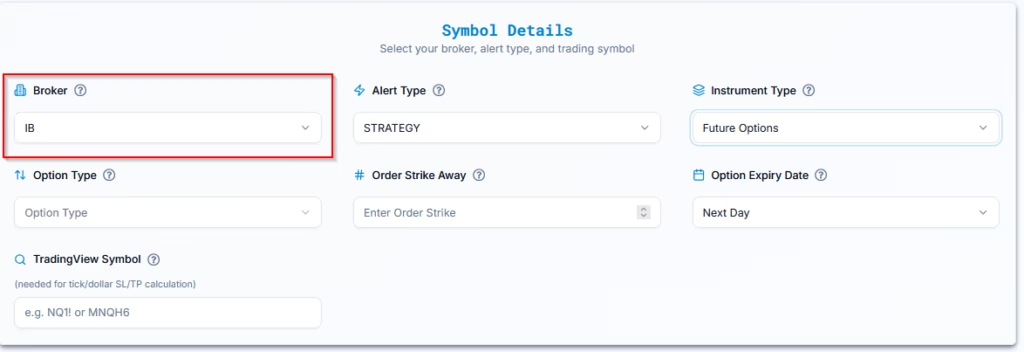
2. Available Brokers in PickMyTrade #
Steps #
- Select Interactive Brokers (IB) from the available options.
3. TradingView Alert Configuration for IB Automation #
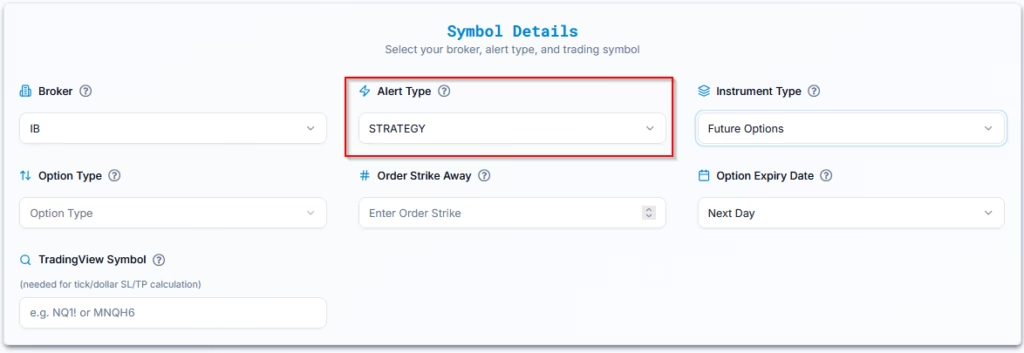
Alert Type Options #
| Alert Type | Description |
| INDICATOR | Alerts based on technical indicators (e.g., RSI, Moving Averages). |
| STRATEGY | Alerts based on predefined trading strategies in TradingView. |
We have selected STRATEGY as our preferred alert type.
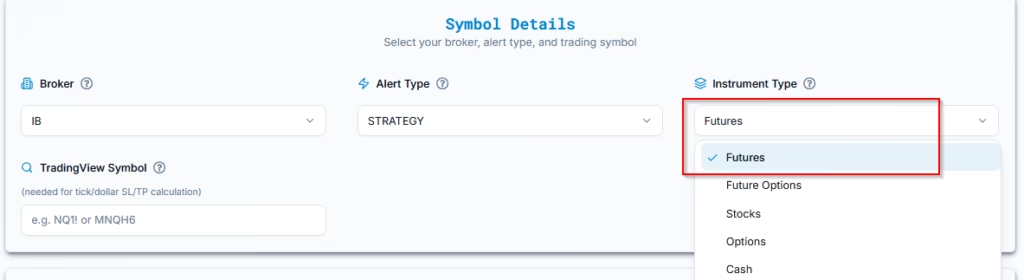
4. Choose the Right Instrument Type #
Choose Futures from the available choices: Futures, Futures Options, Options, Stocks.
5. Enter Symbol for Automating TradingView Strategies in IB #
Specify the trading asset (e.g., NQM6, ES) in Interactive Brokers (IB). This field is required for calculations involving Stop Loss based on ticks or total loss methods.
Important Considerations: #
- If the symbol does not exist or is incorrectly mapped: You must configure it in IB before trades can execute on that symbol.
- Trading a different symbol from the alert: IB allows flexibility. For example:
- If your TradingView chart uses NQ for the alert but you want to trade MNQ, enter MNQ in the IB symbol field.
- No symbol entered: If left blank, IB defaults to the symbol from the TradingView alert.
For more on IB’s supported symbols, visit Interactive Brokers Product Listings
6. Strategy Type and Exit Logic #
Determine how exits will be handled in your strategy:
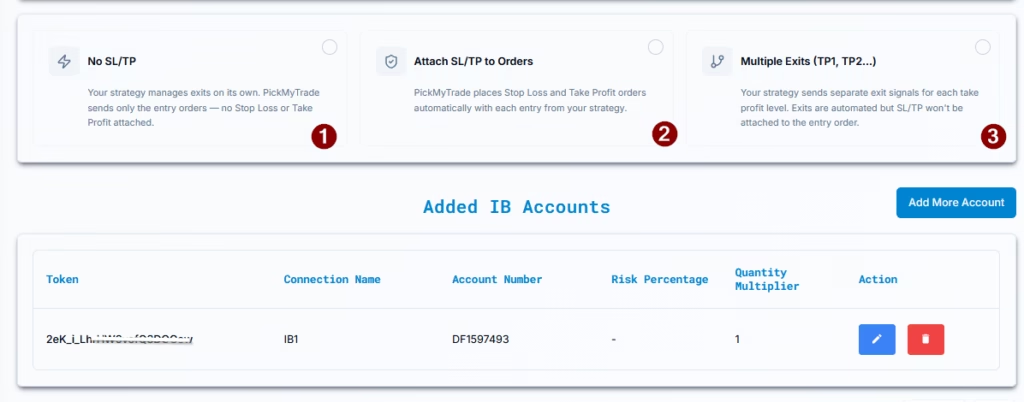
Option 1: No SL/TP (Strategy Controlled Exits) #
- Select this if your TradingView strategy fully manages entries and exits
- PickMyTrade will NOT place any Stop Loss or Take Profit orders
- All exits will be executed only when TradingView sends exit alerts
Use this when:
Your strategy already includes complete exit logic
Option 2: Attach SL/TP to Orders #
- Select this if your strategy does NOT handle exits
- PickMyTrade will place Stop Loss (SL) and Take Profit (TP) with each entry
Features:
- Choose SL/TP type (percentage, price, Total Profit/Loss, etc.)
- Only one SL and one TP per order is supported
Use this when:
You want simple, fixed risk management handled by PickMyTrade
→ Stop Loss / Take Profit / BreakEven Type:
(Refer to the table in the “Select TradingView Indicator” section for a detailed explanation of each option.) Click here.
Option 3: Multiple Exits (TP1, TP2, etc.) #
- Select this if your TradingView strategy uses multiple take-profit levels
- PickMyTrade will NOT require SL/TP configuration
- All exits will be executed based on TradingView alerts
Note:
When using multiple exits, SL/TP cannot be attached to the entry order (Bybit limitation: one SL + one TP per order)
Use this when:
Your strategy scales out of positions (partial exits)
7. Interactive Brokers Account Selection & Setup #
Would you like to add multiple accounts or select a specific account for trade execution?
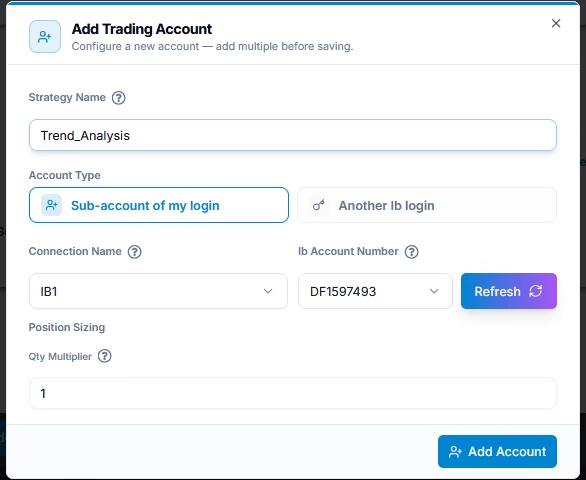
A. Add an IB Subaccount Under an Existing PickMyTrade Login #
If you have multiple IB accounts linked under a single IB login, you can allocate trades to them using quantity multipliers.
- PickMyTrade Connection Name: Choose the IB account where you want to execute trades.
- Quantity Multiplier: Adjusts the number of contracts proportionally for each account.
Example: #
If you have two IB subaccounts:
- IB_Account_1 (Primary) → Multiplier: 1.5 (Executes 1.5 times the default contract size)
- IB_Account_2 (Secondary) → Multiplier: 1.0 (Executes the standard contract size)
This setup ensures proportional trade execution across multiple subaccounts.
B. Add a Separate IB Account Under Another PickMyTrade Login #
For traders managing multiple IB accounts under different PickMyTrade logins, you can link each account individually using a unique authentication token.
- PickMyTrade Token: Enter the token associated with the IB account you want to add.
- PickMyTrade Connection Name: Enter the exact connection name as displayed in your PickMyTrade account.
- Quantity Multiplier: Defines how much the contract size should be adjusted for this account.
Example: #
If you have two separate IB accounts under different PickMyTrade logins:
- IB_Account_3 (Second IB Account) → Multiplier: 2.0
- IB_Account_4 (Primary IB Account) → Multiplier: 1.5
In this scenario, trades in the second IB account execute at 2x the default size, while the primary account follows a 1.5x multiplier, ensuring proportional exposure across both accounts.
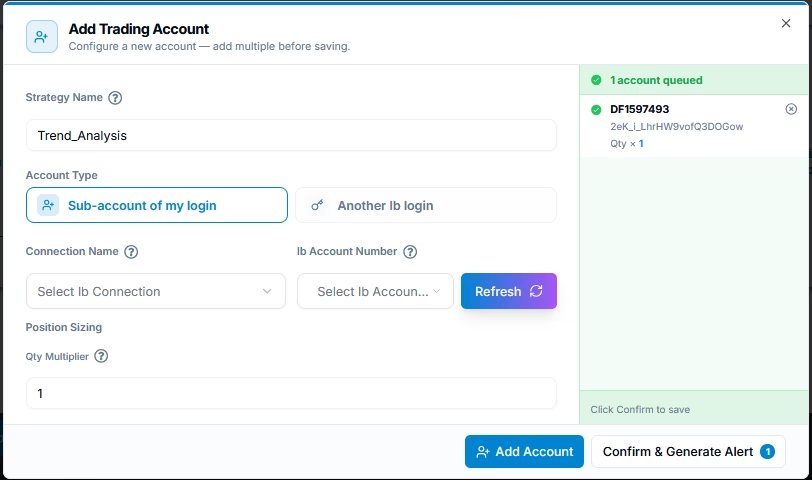
8. Generate the Automation Alert #
Once all accounts are added and configured, click Confirm & Generate Alert button.
Next, follow the link below to learn how to set up your TradingView alert for automated trading:
Setting Up TradingView Alerts for Automated Trading
Last updated: May 18, 2026


