
Want to automate trades using TradingView indicator alerts with the Match-Trader broker? This guide explains how to connect Match-Trader with PickMyTrade, generate alerts, and configure quantity, risk, and SL/TP for reliable automated execution.
1. Connect Your Match-Trader Account to PickMyTrade #
Before creating alerts, you must connect your Match-Trader broker account to PickMyTrade.
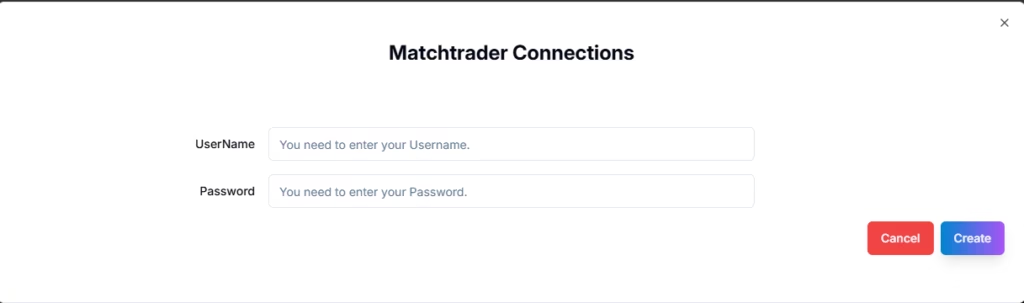
Steps:
- Choose Broker: Match-Trader
- Click Connections in the top-right of PickMyTrade
- Select Add New Connection
- Enter your credentials:
| Field | Description | Example |
|---|---|---|
| Username | Your Match-Trader login | [email protected] |
| Password / API Key | Broker credentials (as required) | ******** |
Click Save and confirm the connection status shows Active.
2. Generate the Alert in PickMyTrade #
Once Match-Trader is connected:
- Go to Generate Alert from the sidebar
- Fill in the required configuration fields
- Click Generate Alert
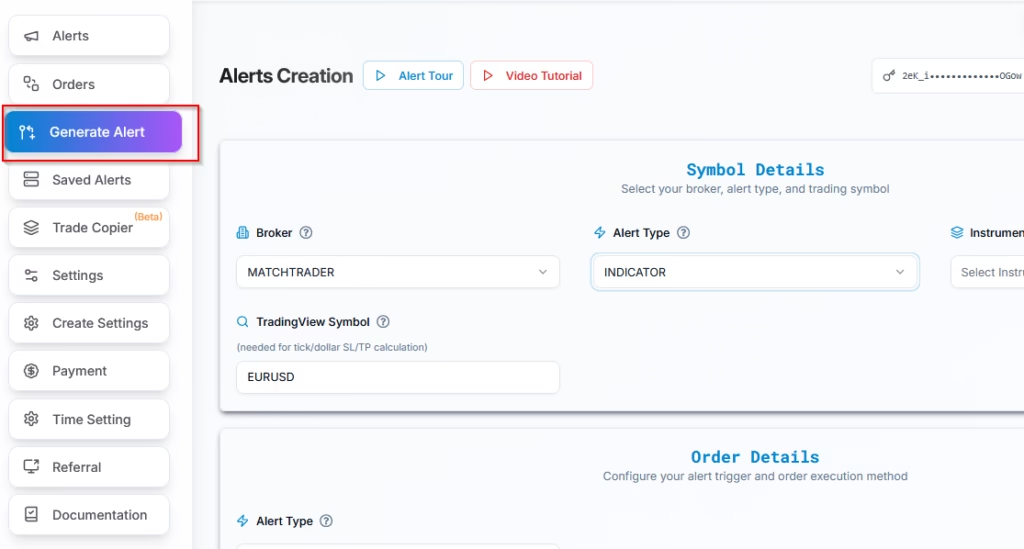
You’ll receive:
- A Webhook URL
- A JSON alert payload
These will be used in TradingView.
3. Select Match-Trader as Your Broker #
- Broker: Match-Trader
- Choose Match-Trader from the broker dropdown
4. Choose Your Alert Type #
Two alert types are supported:
- INDICATOR — For TradingView indicator-based or manual alerts
- STRATEGY — For Pine Script strategies with automated execution
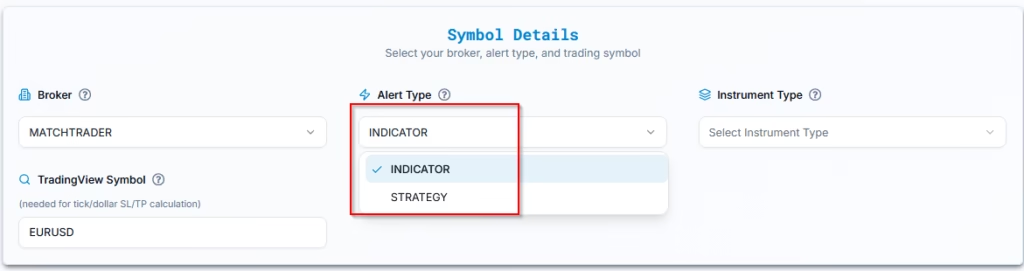
Example:
- Alert Type: INDICATOR
5. Select Instrument Type #
Before entering the symbol, choose the correct Instrument Type to ensure PickMyTrade applies the right execution and pricing logic.
Available options:
- CFD — Use for indices, metals, energies, and CFDs (e.g., NAS100, US30, XAUUSD).
- FOREX — Use for spot Forex pairs with standard FX contract specifications (e.g., EURUSD, GBPJPY).
- FOREXCFD — Use when your broker offers Forex pairs as CFDs instead of spot FX (common with prop firms).
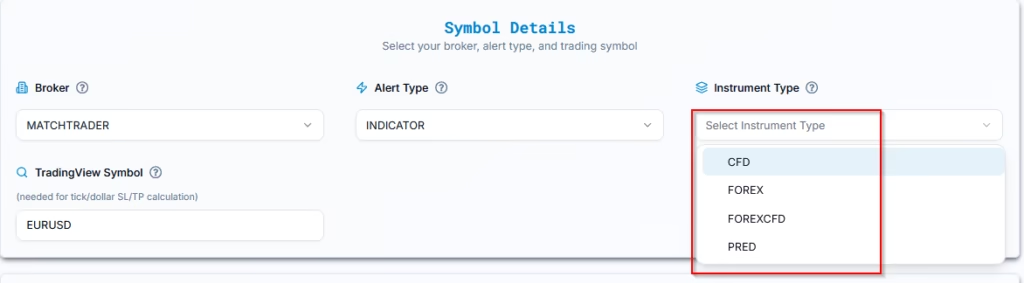
⚠️ Selecting the wrong instrument type may lead to incorrect lot sizing, SL/TP calculation, or order rejection.
6. Enter the TradingView Symbol #
Enter the TradingView symbol, and select symbol from dropdown.
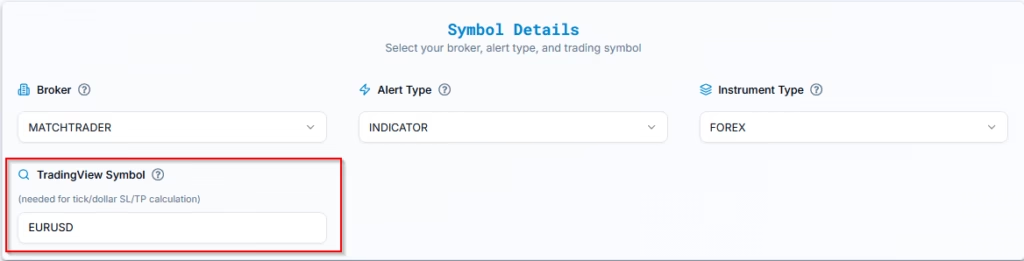
This field is mandatory when using:
- Ticks-based SL/TP
- Risk-percentage sizing
7. Configure Order Action Behavior #
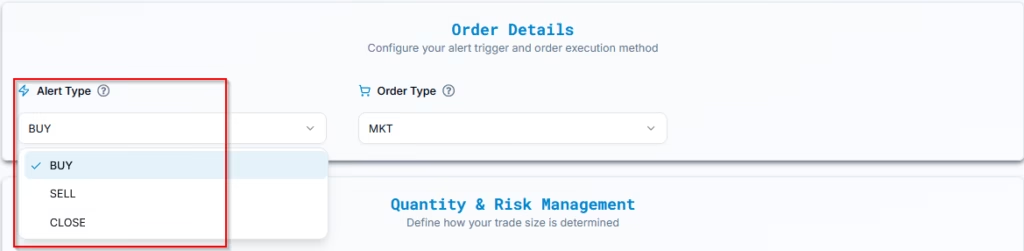
Buy Alert #
- If already in a Buy position → adds to the existing position
- If in a Sell position → closes sell trades, cancels sell orders, then opens a buy
Sell Alert #
- If already in a Sell position → adds to the existing position
- If in a Buy position → closes buy trades, cancels buy orders, then opens a sell
Close Alert #
- Closes all open positions
- Cancels all pending orders
- Does not open a new trade
Example:
- Alert Action: BUY
8. Select Order Type (Market or Limit) #
When configuring your trade action, you can choose how the order is executed on Match-Trader:
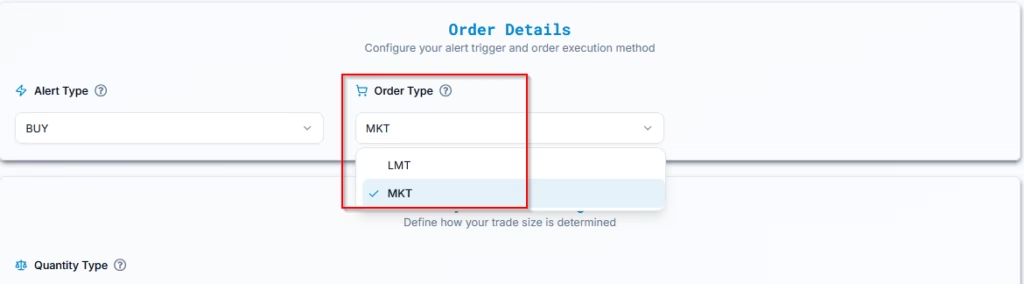
Limit Order
The trade is placed at a predefined price level and will only be executed if the market reaches that price. This is useful for pullback, retracement, or level-based strategies.
Market Order
The trade is executed immediately at the best available market price. This is recommended when fast execution is critical and you want to ensure the position is opened without delay.
9. Quantity & Risk Management Settings #
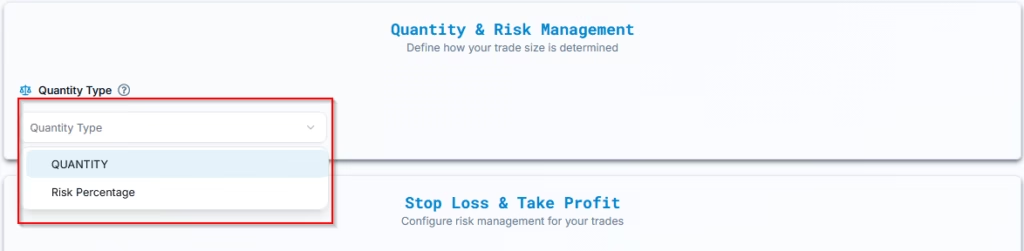
Option A: Fixed Quantity #
- Quantity Type: QUANTITY
- Quantity Value:
1
Sends a fixed number of lots/contracts per trade.
Option B: Risk Percentage #
- Quantity Type: RISK PERCENTAGE
- Value:
2%
PickMyTrade calculates position size so the maximum loss equals the chosen percentage of account balance, based on stop-loss distance.
10. Stop Loss & Take Profit Configuration #
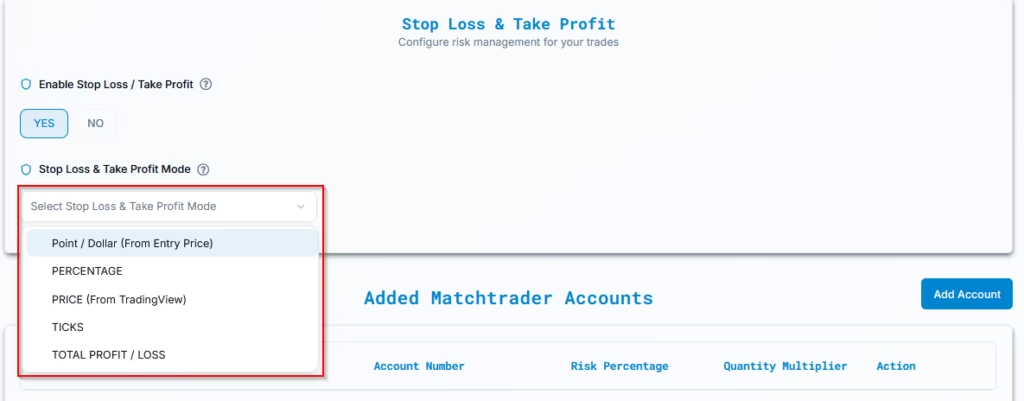
Enable Stop Loss / Take Profit: YES
Match-Trader supports one active SL and TP per symbol. Any new alert in the same direction will overwrite existing SL/TP values.
Available SL/TP Types #
- Dollar (from Entry)
- Percentage
- Price (From TradingView)
- Ticks
- Total Profit / Loss (USD)
When configuring Stop Loss (SL) and Take Profit (TP) in automated trading, you can choose different methods to define exit levels. Each method manages risk and profits in a distinct way, depending on whether you prefer fixed values, percentages, or price-based logic. #
1. Dollar (from Entry) #
Sets SL/TP using a fixed dollar amount from the entry price. This is useful when you want precise control over monetary risk.
Example:
Entry at $21,000
- Stop Loss: $500 → exits at $20,500
- Take Profit: $1,000 → exits at $22,000
2. Percentage #
Calculates SL/TP as a percentage of the entry price, keeping risk proportional to market value.
Example:
Entry at $21,000
- Stop Loss: 2% → exits at $20,580
- Take Profit: 5% → exits at $22,050
3. Price (From TradingView) #
Defines SL/TP at exact price levels, often based on technical analysis like support and resistance.
Reference Document: TradingView Plot Placeholder Integration
Example:
Entry at $21,000
- Stop Loss: $20,800
- Take Profit: $22,200
4. Ticks #
Uses a fixed number of ticks from the entry price. Commonly used in futures markets.
Example (NQ futures):
- 1 tick = 0.25 points = $5
- Stop Loss: 20 ticks → $100 risk
- Take Profit: 40 ticks → $200 reward
5. Total Profit / Loss #
Closes the position once a predefined total profit or loss is reached, regardless of price.
Example:
Target Profit: $1,000
The trade closes as soon as either limit is hit.
Max Loss: $500
11. Match-Trader Account Management in PickMyTrade #
10.1 Add Match-Trader Account (Same PickMyTrade Account) #
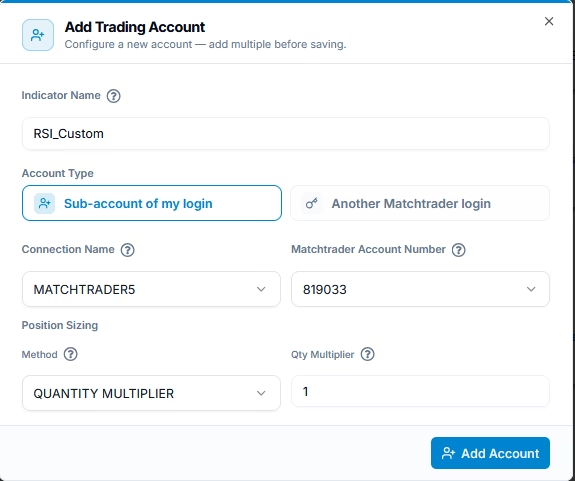
| Field | Example | Description |
| PickMyTrade Conn. Name | MATCHTRADER1 | Select your Match-Trader connection |
| Match-Trader Acc. Name | MT-ACC-001 | Choose broker account |
| Option | QUANTITYMULTIPLIER | Position sizing method |
| Qty Multiplier | 1 | 1 = same size, 2 = double |
Click Add Account and Confirm & Generate Alert.
10.2 Add Match-Trader Account (Different PickMyTrade Account) #
Used when routing trades across multiple PickMyTrade accounts.
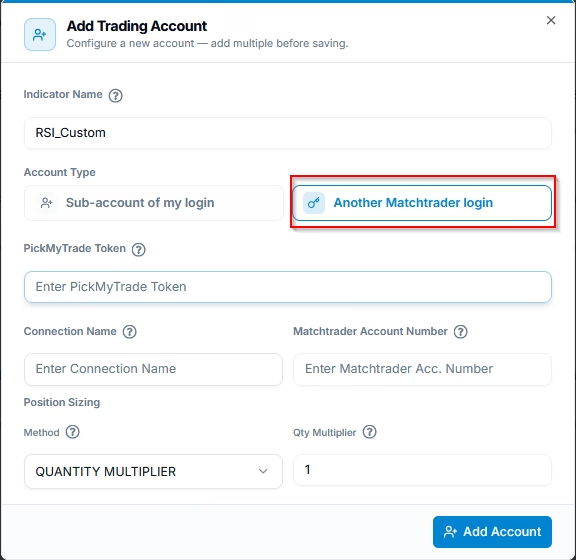
| Field | Example | Description |
| PickMyTrade Token | target_account_token | Token from destination account |
| PickMyTrade Conn. Name | MATCHTRADER1 | Must exist in target account |
| Match-Trader Acc. Name | MT-ACC-002 | Exact broker account name |
| Option | QUANTITYMULTIPLIER | Same sizing logic |
| Qty Multiplier | 1 | Trade size multiplier |
Execution will fail if the token or account mapping is incorrect.
10.3 Generate Alert Code for Indicator Execution
Once all accounts are added and configured, click Confirm & Generate Alert button.
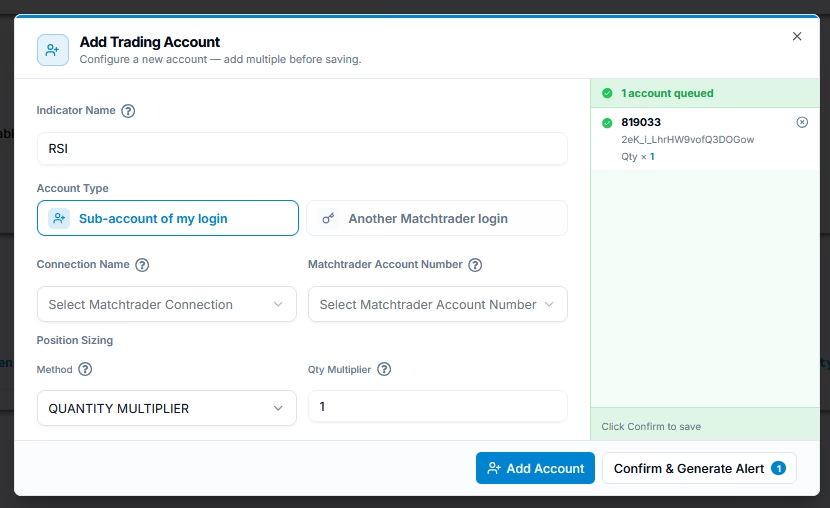
12. Final Step – Generate & Use Your Alert #
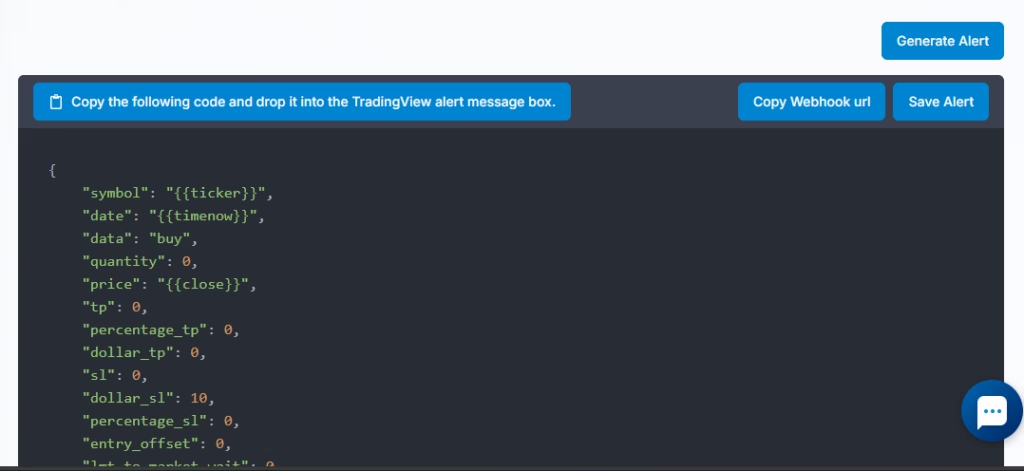
- Copy the Webhook URL and JSON payload
- Paste them into TradingView’s alert dialog
Next, follow the TradingView setup guide to complete automation with Match-Trader.
Setting Up TradingView Alerts for Automated Trading
More Resources #
Ready to connect Match-Trader?
See Match-Trader automation on pickmytrade.io
Last updated: September 29, 2026


