
This guide shows how to connect Ironbeam with PickMyTrade to automate futures trades using TradingView strategy or indicator alerts.
Step 1 : Ironbeam API Key Setup #
To connect your Ironbeam account with PickMyTrade, you’ll first need to generate an API key for your Ironbeam account.
Go to the Ironbeam login page:
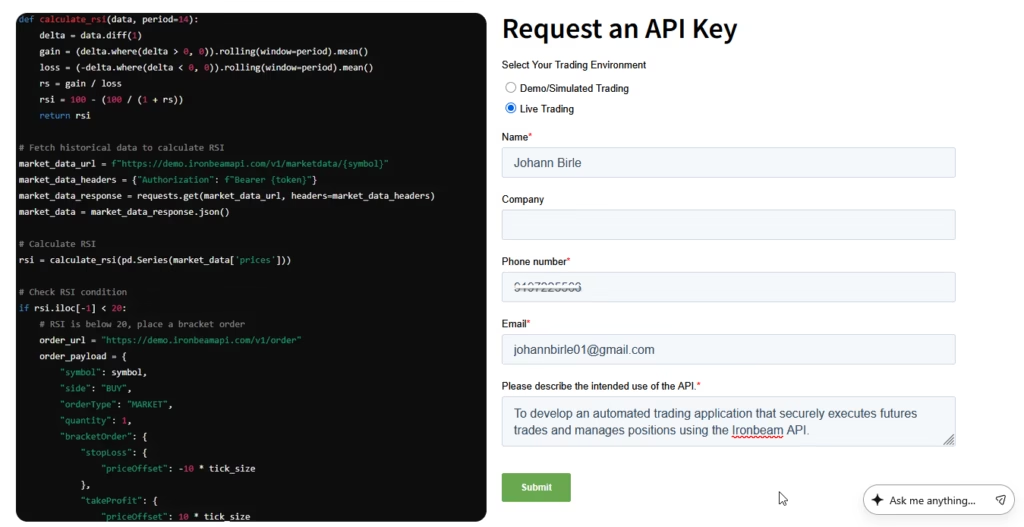
At the bottom of the page, you’ll find the Request an API Key form
Fill out the required fields as shown below.
| Field | Description |
|---|---|
| Trading Environment | Select Live Trading if you are requesting API access for a live account. Select Demo/Simulated Trading if you intend to test in a demo environment. |
| Name | Enter your full name. |
| Company | Optional. |
| Phone Number | Enter your contact number. |
| Enter the email address associated with your Ironbeam trading account. | |
| Intended Use of the API | To develop an automated trading application that securely executes futures trades and manages positions using the Ironbeam API. |
After completing the form, click Submit.
After submitting your API request, Ironbeam will review your application before issuing API Key.
- Demo Account: API access is typically granted within 1–3 business days.
- Live Funded Account: API access is also typically granted within 1–3 business days. However, it may take longer if Ironbeam needs to verify your account or enable the necessary API permissions.
Step 2 : Open PickMyTrade Dashboard #
Go to: pickmytrade.io
In the top-right corner, open the broker drop-down menu and select Ironbeam as your broker.
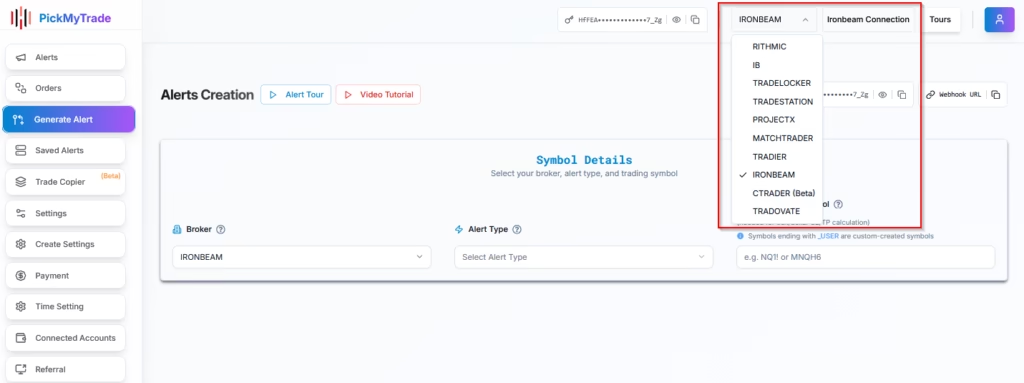
A pop-up window will appear. Click on Add New Connection.

Step 3 : Connect API Key in PickMyTrade #
Fill in the following fields to establish the connection with your Ironbeam account.
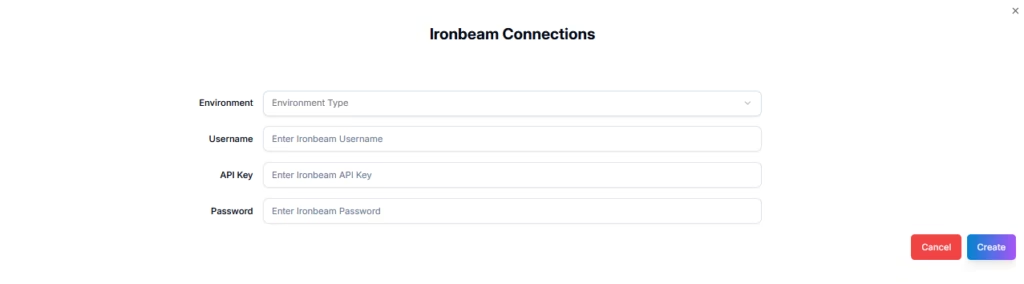
| Field | Description |
|---|---|
| Environment | Select the appropriate environment (Demo or Live) . |
| Username | Enter your Ironbeam account username. |
| API Key | Enter the API key provided by Ironbeam after your API request has been approved. |
| Password | Enter your Ironbeam account password. |
After entering all the required information, click Create.
Step 4: Connection Successful #

When the connection button turns 🟢 Green, your Ironbeam account is successfully connected to PickMyTrade.
Step 12: Start Automated Trading #
Once your Ironbeam account is successfully connected to PickMyTrade, you can proceed to automate your trading strategies or indicator alerts.
For detailed guidance, refer to the following resources:
Automating TradingView Indicators Alerts in Ironbeam
Automating TradingView Strategy Alerts in Ironbeam
You are now ready to:
- Generate TradingView alerts
- Automate futures trades on Ironbeam using PickMyTrade
More Resources #
Want to automate trades on platforms beyond Rithmic, such as Interactive Brokers, TradeLocker, TradeStation, or ProjectX?
Explore all PickMyTrade setup guides
Using Tradovate instead?
View the Tradovate automation guide
Ready to connect Ironbeam?
See Ironbeam automation on pickmytrade.io
Last updated: September 29, 2026


