Introduction #
This guide explains how to automate TradingView strategy alerts in Binance using PickMyTrade.
Follow each step carefully to ensure that strategy signals from TradingView trigger real trades in your Binance account.
1. Choose a TradingView Strategy to Automate in Binance #
If you plan to automate your TradingView setup, choose Strategy in the dropdown menu.

2. Configure Symbol for Strategy Execution in Binance #
In PickMyTrade, select BINANCE as the broker and enter the TradingView symbol you want to trade.
Example:
BNB/USDT → enter BNB/USDT.

Specifying the asset (symbol) to trade in PickMyTrade is optional. However, it becomes required if your stop-loss or take-profit settings depend on tick size or dollar values. If you do not enter a symbol, PickMyTrade will automatically use the symbol from your TradingView chart alert.
If the symbol doesn’t exist or isn’t mapping correctly: You’ll need to set it up first in PickMyTrade. Only after that will trades happen on that symbol.
3. Managing Exit Rules in Automated Binance Strategies #
Determine how exits will be handled in your strategy
Multiple Exits (TP1, TP2, etc.) #
YES:
Choose this option if your TradingView strategy already manages multiple exits (like TP1, TP2).
- PickMyTrade will not ask you to set additional SL/TP values.
- All exits will be automated directly from your TradingView strategy alerts.
- Note: When multiple take-profit levels are used, PickMyTrade cannot attach a Stop Loss or Take Profit directly to the entry order (since only one TP + one SL can be attached per order).

NO: #
Select this if your strategy does not manage exits on its own.
- You will need to manually configure Stop Loss (SL) and Take Profit (TP) inside PickMyTrade.
- In this mode, only one TP and one SL attachment per entry order are supported.
Risk Management #
After you select NO for “Would your strategy have multiple exit like TP1, TP2 etc?”, the Risk Management section becomes available.
Would you like to place Stop Loss and Take Profit orders in PickMyTrade with each order from your strategy? #

YES:
If you select YES, the Stop Loss / Take Profit Type dropdown will appear.
- This allows you to choose how your SL and TP should be applied (percentage, ticks, price, etc.).
- Only one Stop Loss and one Take Profit can be attached per entry order.
- To learn more about Stop Loss, Take Profit refer to the explanation table provided earlier in the “Select TradingView Indicator” section — Click here.(pending to add)
NO:
If you select NO, PickMyTrade will not place SL/TP for you. Your strategy must manage exits on its own.
4. Assign Binance Accounts for Strategy Execution #
PickMyTrade allows you to automate trades on one or multiple Binance accounts.
When you enable account selection, additional account and risk controls appear.

4.1 Add Binance Account in Current PickMyTrade Login #
| Field | Example | Explanation |
|---|---|---|
| PickMyTrade Conn. Name | BINANCE1 | Select your Binance connection name. |
| Qty Multiplier | 1 | This multiplies your default order size. If your default order size is 0.01 BTC and you set the multiplier to 1, the order remains 0.01 BTC. If you set it to 2, the order becomes 0.02 BTC (double the size). |
4.2 Add Binance Account From Another PickMyTrade Login #
Used when the execution account belongs to a different PickMyTrade login.
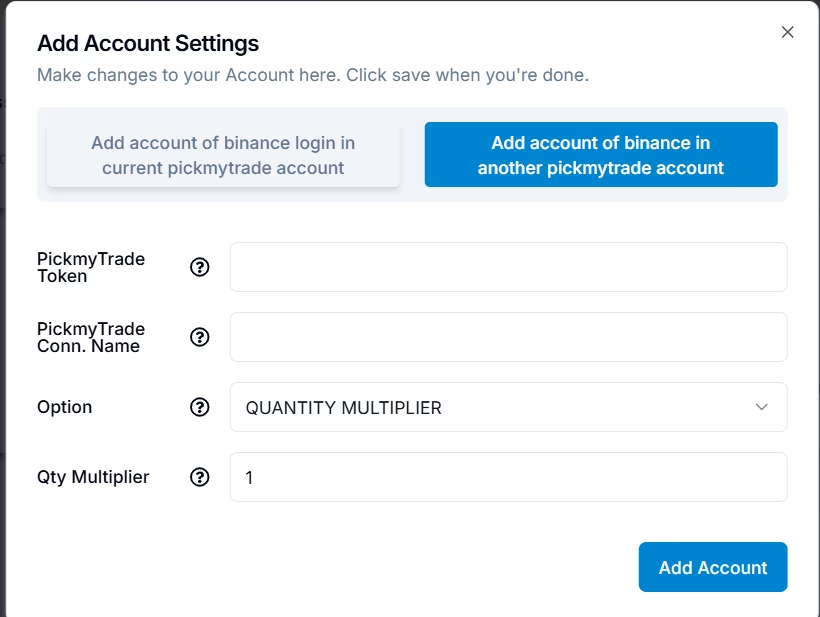
| Field | Example | Explanation |
|---|---|---|
| PickMyTrade Token | abcd1234xyz | Token from the target PickMyTrade account. |
| Connection Name | BINANCE1 | Must match the connection name in that account. |
| Qty Multiplier | 1 | Same usage as above. |
Ensure:
- The token is correct
- Binance connection is properly configured in the target account
Otherwise, execution will fail.
5. Generate Binance Automation Alert in PickMyTrade #
After completing configuration, click Generate Alert.

PickMyTrade will display:
- The JSON message required for TradingView
- The Webhook URL
5.1 Copy JSON Code #

Click the button labeled “Copy the following code…”
Paste this JSON into the TradingView alert message box.
6. Create TradingView Alert for Binance Automation #
6.1 Open Strategy Alert Menu #
On the TradingView chart:
- Hover over the strategy name
- Click the three-dot menu
- Select “Add alert on Strategy”


6.2 Configure Alert Settings #
Symbols: BNBUSDT (or the symbol you want to trade)
Condition: The strategy you are automating
Interval: Select the chart timeframe on which you want automation to run

6.3 Clear TradingView Message Box #
Delete all default text before pasting your automation JSON.
6.4 Paste JSON From PickMyTrade #
Paste the entire JSON code exactly as generated.
This JSON contains:
- Order direction
- Quantity
- Price
- Token
- Platform (BINANCE)

6.5 Add Webhook URL #
Paste your PickMyTrade Webhook URL:

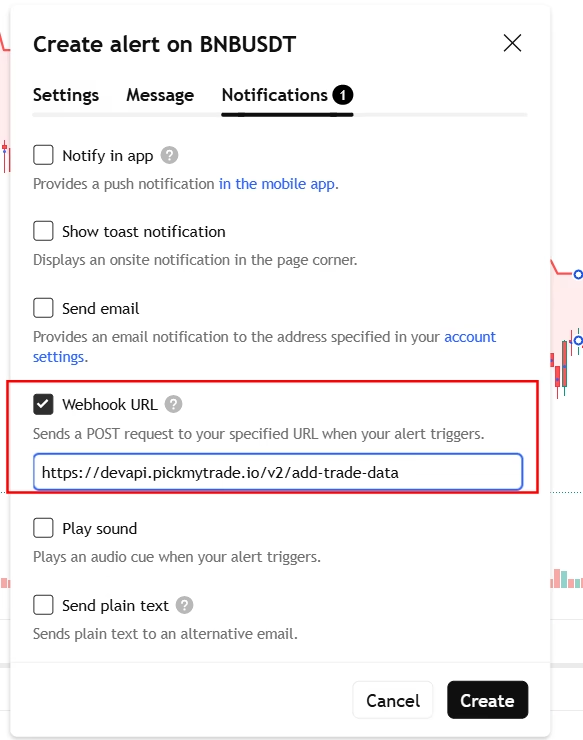
Ensure Webhook URL is enabled.
6.6 Create the Alert #
Click Create.
Your automated TradingView → Binance alert is now active.

7. Verify Binance Automation #
7.1 TradingView Alerts Panel #
Your newly created alert will appear under the Alerts tab and show as Active.
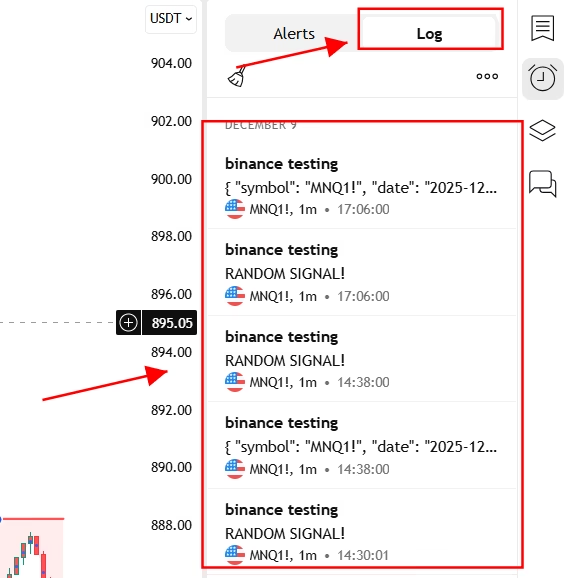
7.2 TradingView Logs #
When the alert triggers, TradingView logs will show:
- Alert name
- Timestamp
- JSON payload
7.3 PickMyTrade Alerts Page #
Inside PickMyTrade > Alerts, you will see:
- Alert trigger time
- Symbol
- Buy or Sell direction
- Order status
- Order type (Market, Limit, etc.)

More Resources #
Want to automate trades on platforms beyond Rithmic, such as Interactive Brokers, TradeLocker, TradeStation, or ProjectX?
Explore all PickMyTrade setup guides
Using Tradovate instead?
View the Tradovate automation guide


