1. Introduction #
This guide explains how to start automating TradingView indicator alerts in TradeLocker using PickMyTrade. Whether you’re trading crypto, forex, or CFDs, this step-by-step process ensures your signals trigger real trades with speed and precision.
2. Generate Alerts for TradingView Indicators in TradeLocker #
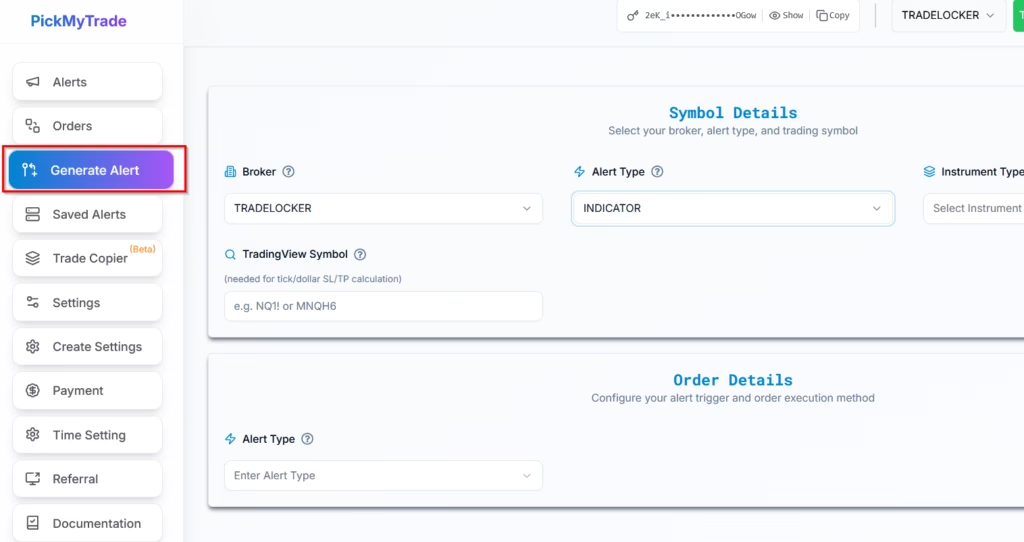
From your PickMyTrade dashboard, go to Generate Alert to start configuring your automated trade.
3. Select TradeLocker as Your Broker for Automated Trading #
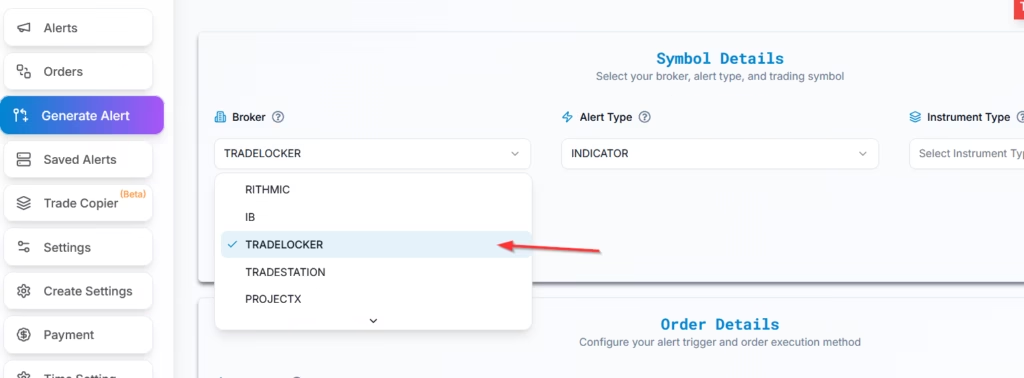
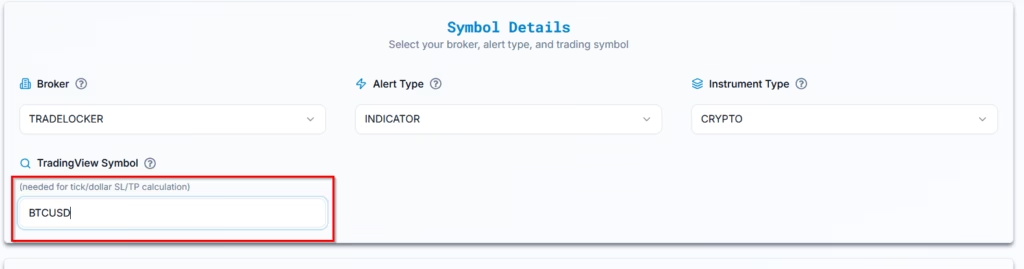
Choose TradeLocker as your broker from the dropdown list.
4. Configure TradingView Indicator Alerts for Automation #
Alert Type Options #
| Alert Type | Description |
|---|---|
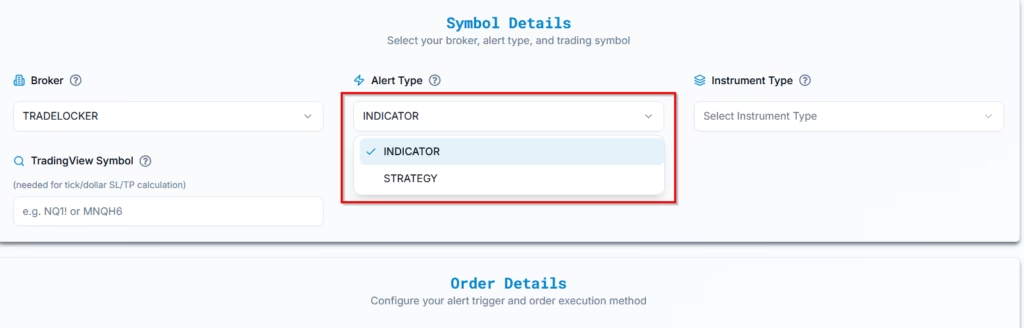
| INDICATOR | Based on any technical indicator (e.g., RSI, SuperTrend) |
| STRATEGY | Based on TradingView’s built-in or custom backtested strategies |
Select INDICATOR as the preferred alert type for this setup.
5. Set Instrument Type for TradeLocker Auto Execution #
Choose the type of instrument you are trading:
- Crypto
- Forex
- Equity CFD
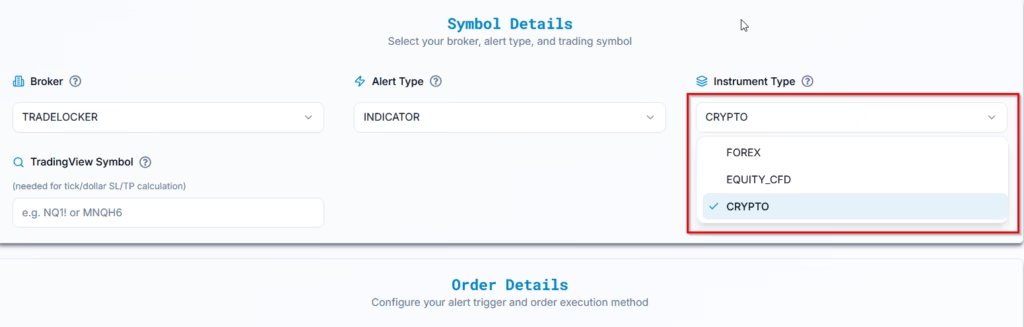
Then enter the TradingView Symbol (e.g., BTCUSD). This field is optional unless you’re using stop loss types based on ticks or total loss.
6. Define Trade Actions for TradingView Alerts in TradeLocker #
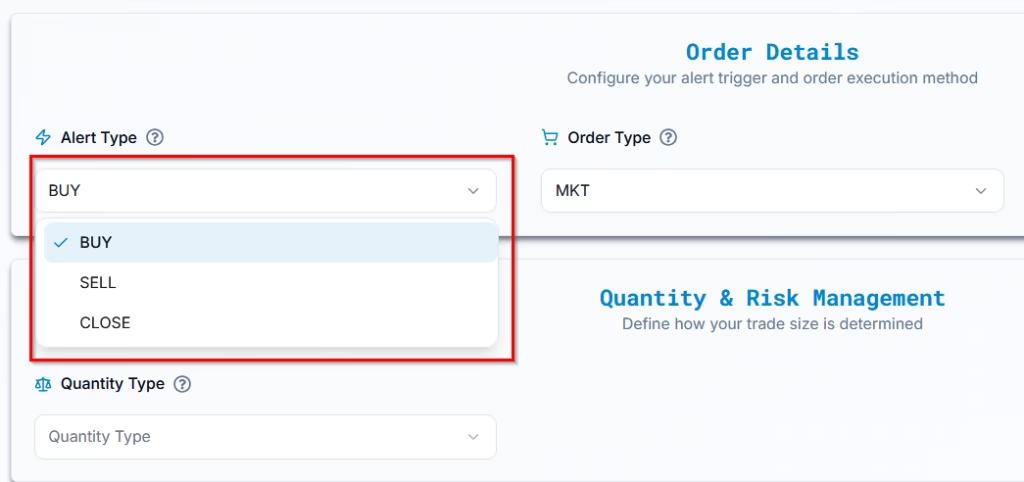
Select the type of trading action you want the alert to trigger:
Buy Alert #
If already in a Buy Position:
Triggering a new Buy Alert will add to the current buy position.
If in a Sell Position:
The system will first close the sell position, cancel all open sell orders, then open a new buy position.
All open sell orders will be canceled when a Buy Alert is triggered.
Sell Alert #
If already in a Sell Position:
Triggering a new Sell Alert will add to the current sell position.
If in a Buy Position:
The system will first close the buy position, cancel all open buy orders, then open a new sell position.
All open buy orders will be canceled when a Sell Alert is triggered.
Close Alert #
The system will close all open positions and cancel all open orders.
It will not open any new positions.
7. Choose Fixed Quantity or Risk-Based Trade Sizing #
You have two ways to define trade size:
- Fixed Quantity – Manually enter the number of contracts or units.

- Risk Percentage –When using Risk Percentage, the system calculates your trade size so that your maximum loss equals a fixed percentage of your total account balance, based on the stop-loss distance.

Note: If you choose Risk Percentage, a stop loss is mandatory as it defines the trade size.
8. Enable SL/TP When Automating Indicator Alerts #
Answer: Do You Want Stop Loss / Take Profit?
Choose YES to enable SL/TP configuration.

9. SL/TP Methods for TradingView Indicator Alerts in TradeLocker #
PickMyTrade supports five SL/TP configuration types. Select one based on your preferred method:
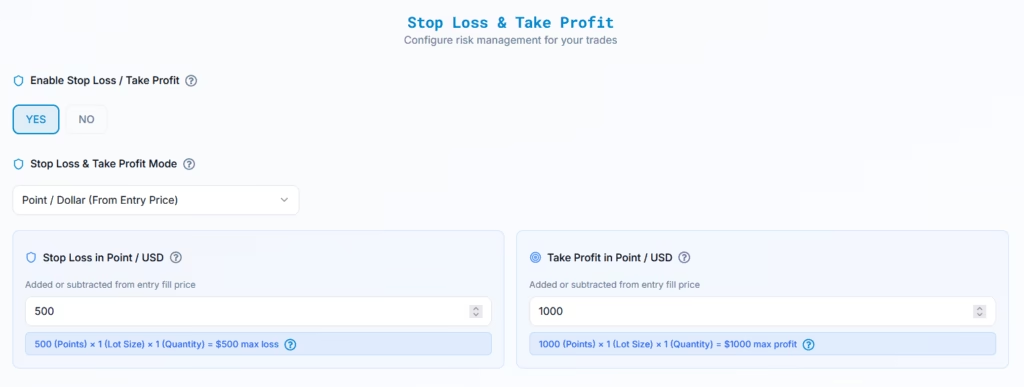
9.1 Point / Dollar (From Entry Price) #
Order Configuration
You define SL and TP as fixed USD amounts added to or subtracted from the entry price.
- Stop Loss: $500
- Take Profit: $1,000
How It Works
- Stop Loss Price = 102,600 − 500 = 102,100
- Take Profit Price = 102,600 + 1,000 = 103,600
Result Calculation Example — BTC Futures #
Assumption:
1 contract = 1 BTC
Stop Loss = $500
Take Profit = $1,000
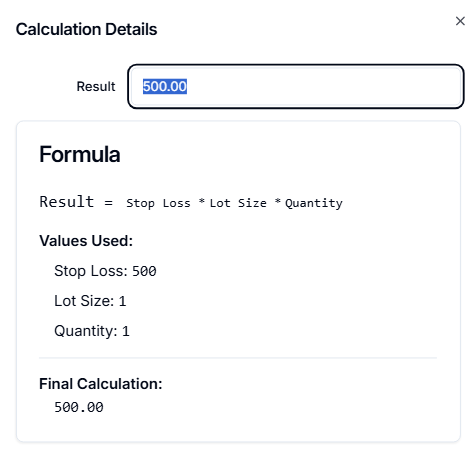
Formula: #
Result = Stop Loss × Lot Size × Quantity
Values Used: #
- Stop Loss = 500
- Lot Size = 1 (BTC per contract)
- Quantity = 1 (Number of contracts)
Loss Calculation: #
500 × 1 × 1 = $500
Profit Calculation: #
1,000 × 1 × 1 = $1,000

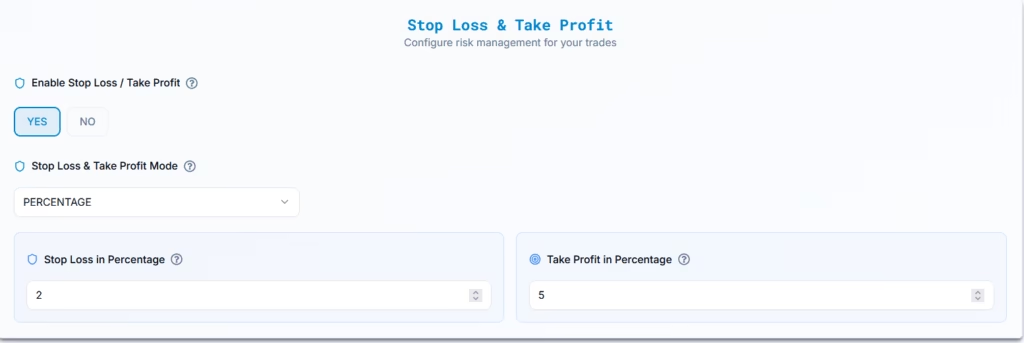
9.2 Percentage #
Order Configuration
You define SL and TP as a percentage of the entry price.
- Stop Loss: 2%
- Take Profit: 5%
How It Works
- Stop Loss Amount = 102,600 × 0.02 = 2,052
- Stop Loss Price = 102,600 − 2,052 = 100,548
- Take Profit Amount = 102,600 × 0.05 = 5,130
- Take Profit Price = 102,600 + 5,130 = 107,730
Result Calculation
For 1 contract:
- Total Loss = $2,052
- Total Profit = $5,130
9.3 Price (From TradingView) #
Order Configuration
Instead of static prices, use TradingView’s dynamic variables like:
- Stop Loss:
{{plot_1}} - Take Profit:
{{plot_2}}
How It Works
When the alert is triggered, PickMyTrade pulls real-time values from the indicator’s plots.
Example
At the time of alert:
{{plot_1}}= 101,000 → SL = 101,000{{plot_2}}= 105,000 → TP = 105,000
Alert Message
Stop Loss: {{plot_1}}, Take Profit: {{plot_2}}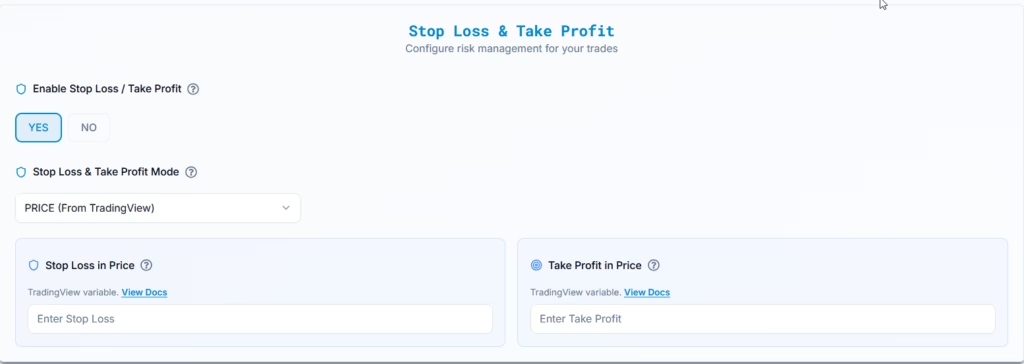
9.4 Ticks #
Order Configuration #
In this method, you define both Stop Loss (SL) and Take Profit (TP) in ticks.
Assumptions: #
- Min Tick = 0.01
- Lot Size = 1
- Entry Price = 102,600
- Stop Loss = 5,000 ticks
- Take Profit = 10,000 ticks
How It Works: #
- Stop Loss Movement = 5,000 ticks × 0.01 = 50 points
- Take Profit Movement = 10,000 ticks × 0.01 = 100 points
- Stop Loss Price = 102,600 − 50 = 102,550
- Take Profit Price = 102,600 + 100 = 102,700

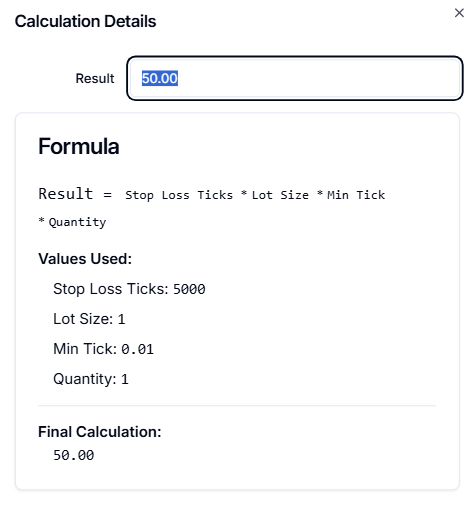
Result Calculation (1 Contract) #
Formula:Result = Tick Count × Lot Size × Min Tick × Quantity
Stop Loss Example: #
- Tick Count = 5,000
- Lot Size = 1
- Min Tick = 0.01
- Quantity = 1
Result:
5,000 × 1 × 0.01 × 1 = $50.00
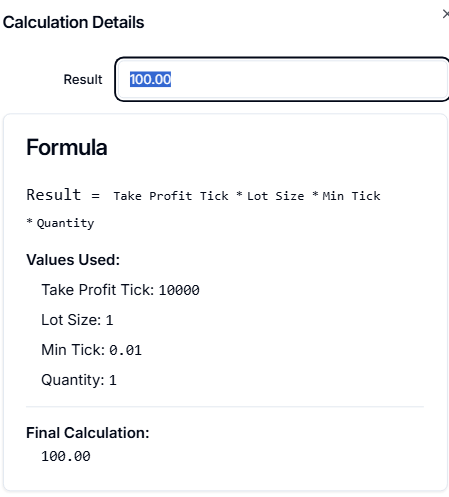
Take Profit Example: #
- Tick Count = 10,000
- Lot Size = 1
- Min Tick = 0.01
- Quantity = 1
Result:
10,000 × 1 × 0.01 × 1 = $100.00
Multiply by Quantity for total result.
For 2 contracts, the result would be doubled:
- Stop Loss = $100
- Take Profit = $200
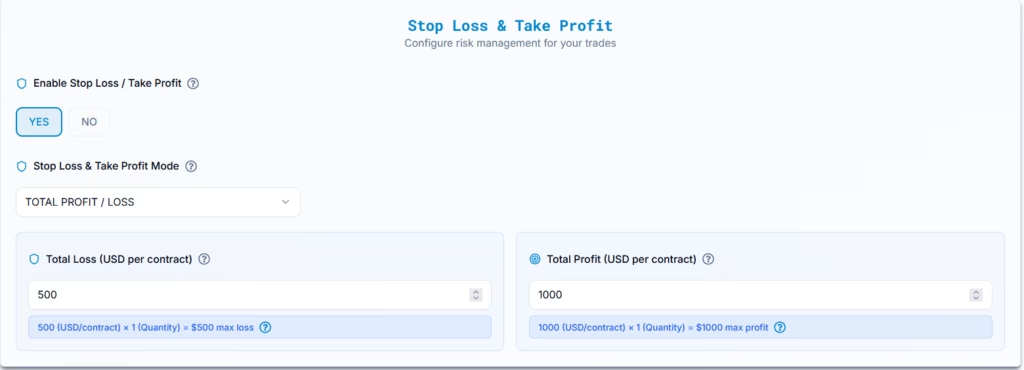
9.5 Total Profit / Loss #
Order Configuration #
You define your Stop Loss and Take Profit in absolute USD values per contract.
Example Configuration: #
- Stop Loss per Contract = $500
- Take Profit per Contract = $1,000
- Quantity = 1 contract
How It Works: #
- Total Loss = $500 × 1 = $500
- Total Profit = $1,000 × 1 = $1,000
Point Movement for Reference (Optional) #
Assuming the underlying asset (e.g., BTCUSD) moves $1 per point, and the Entry Price is 102,600:
- SL in Points = $500 ÷ $1 = 500 points
- TP in Points = $1,000 ÷ $1 = 1,000 points
- Stop Loss Price = 102,600 − 500 = 102,100
- Take Profit Price = 102,600 + 1,000 = 103,600
10. Assign TradeLocker Accounts for Automated Alert Execution #
Once you’ve configured your alert and SL/TP settings, the next step is to select the trading account for execution. PickMyTrade allows both single-account and multi-account execution. You also have the option to manage position sizing via Quantity Multiplier or Risk Percentage.
Would you like to add multiple accounts or select a specific account for trade execution? #
Answer: YES
Additional configuration fields become visible, allowing you to connect your TradeLocker accounts and define execution parameters.
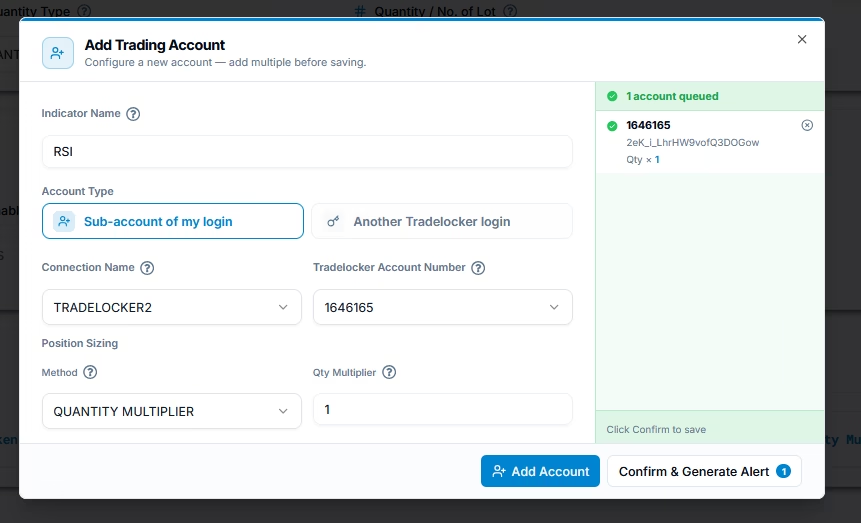
Add Account Settings #
When adding a TradeLocker account to your current PickMyTrade account, configure the following fields:

| Field Name | Example Input | Explanation |
|---|---|---|
| PickMyTrade Conn. Name | TRADELOCKER1 | Choose the correct connection name from the dropdown. Ensure it matches the TradeLocker connection you created earlier. |
| TRADELOCKER Acc. Name | TL001928 | Choose your TradeLocker account from the dropdown. This must be an account linked to your current TradeLocker login. |
| Option | QUANTITY MULTIPLIER / RISK PERCENTAGE | Select your preferred position sizing method. |
| QUANTITY MULTIPLIER | 1 (if selected) | If a multiplier of 2 is selected, trade size will be doubled. Example: 5 contracts × 2 = 10 contracts. |
| RISK PERCENTAGE | 2% (if selected) | If selected, each trade will risk 2% of total account capital. For a $50,000 account, the max risk per trade is $1,000. |
Make sure the TradeLocker connection and account names are properly selected from the dropdown menus to ensure execution works correctly.
10.2 Add TradeLocker Account in Another PickMyTrade Account #
If you want to link a TradeLocker account to a different PickMyTrade account (not your currently logged-in one), use the following configuration.
This is useful when managing multiple PickMyTrade logins or setting up execution for accounts not tied directly to your active session.
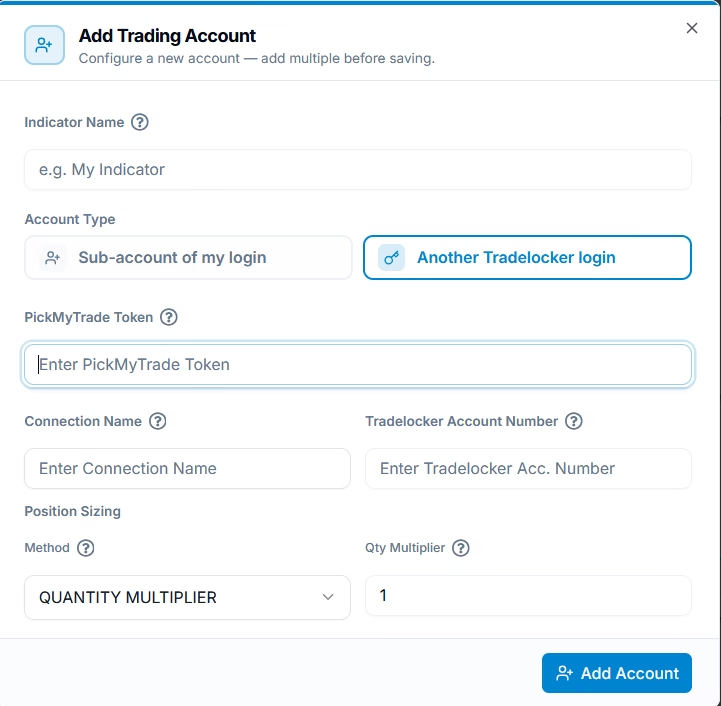
Add Account Settings (Cross-Account Configuration) #
| Field Name | Example Input | Explanation |
|---|---|---|
| PickMyTrade Token | abcd1234xyz | Enter the unique PickMyTrade Token from the account you want to integrate. This allows you to push trades into a different PickMyTrade account. |
| PickMyTrade Conn. Name | TRADELOCKER1 | Define the connection name. This should correspond to the TradeLocker connection within the target PickMyTrade account. |
| TRADELOCKER Acc. Name | TL002091 | Enter the exact TradeLocker account name as it appears in the TradeLocker terminal. |
| Option | QUANTITY MULTIPLIER / RISK PERCENTAGE | Choose your preferred position sizing method. |
| QUANTITY MULTIPLIER | 1 (if selected) | Multiplies all trade quantities. For example, if a trade normally uses 3 contracts, setting this to 2 will result in 6 contracts. |
| RISK PERCENTAGE | 2% (if selected) | Automatically calculates position size based on a percentage of account capital. For example, 2% of a $50,000 account = $1,000 max risk per trade. |
Ensure the PickMyTrade Token is copied correctly and the TradeLocker connection exists in the target account, or execution will fail.
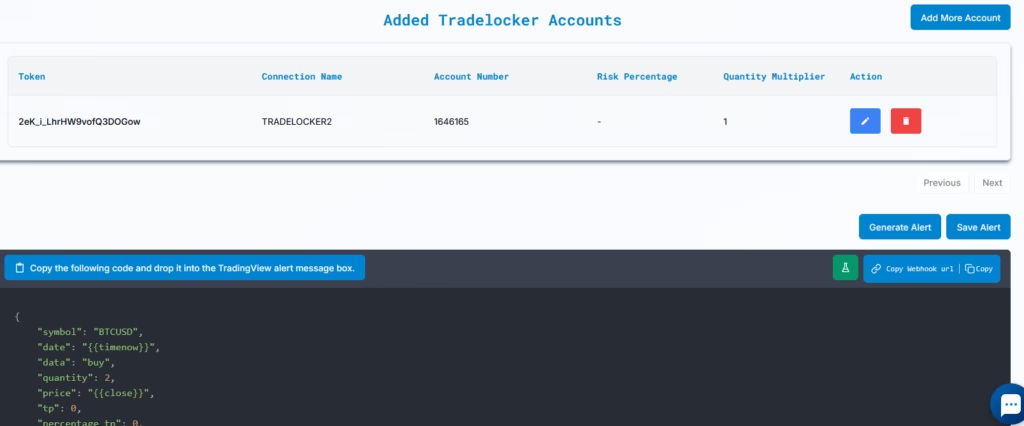
10.3 Generate Alert Code for Indicator Execution
Once all accounts are added and configured, click Confirm & Generate Alert button.
11.Final Alert for TradingView and TradeLocker Automation #
After generating the alert, you’ll receive a JSON payload.
Next, follow the link below to learn how to set up your TradingView alert for automated trading:
Setting Up TradingView Alerts for Automated Trading
More Resources #
Want to automate trades on platforms beyond Rithmic, such as Interactive Brokers, TradeLocker, TradeStation, or ProjectX?
Explore all PickMyTrade setup guides
Using Tradovate instead?
View the Tradovate automation guide
Last updated: May 10, 2026


